When you are running a new website there is some problem with design or functionality. At this time, you may don’t want to show your website with visitors. It’s a very common thing for all website owners. If at this time visitors saw your website, they will leave with taking a bad reputation from your website. That’s why many owners don’t want to show their website to the visitors at this time. At this stage, you can enable maintenance mode for your website. So, visitors can know about your website activities. Otherwise, the visitor will forget your website. On the other hand, the visitor should think it’s a fake website. In this article, I will show you how to enable maintenance mode for your WordPress website.
How many processes for enabling maintenance mode?
You can add maintenance mode on your website using coding. But many users don’t have enough idea about coding. There is another way to enabling maintenance mode using the WordPress plugin. We will learn to enable maintenance mode using the WordPress plugin.
Add a new plugin
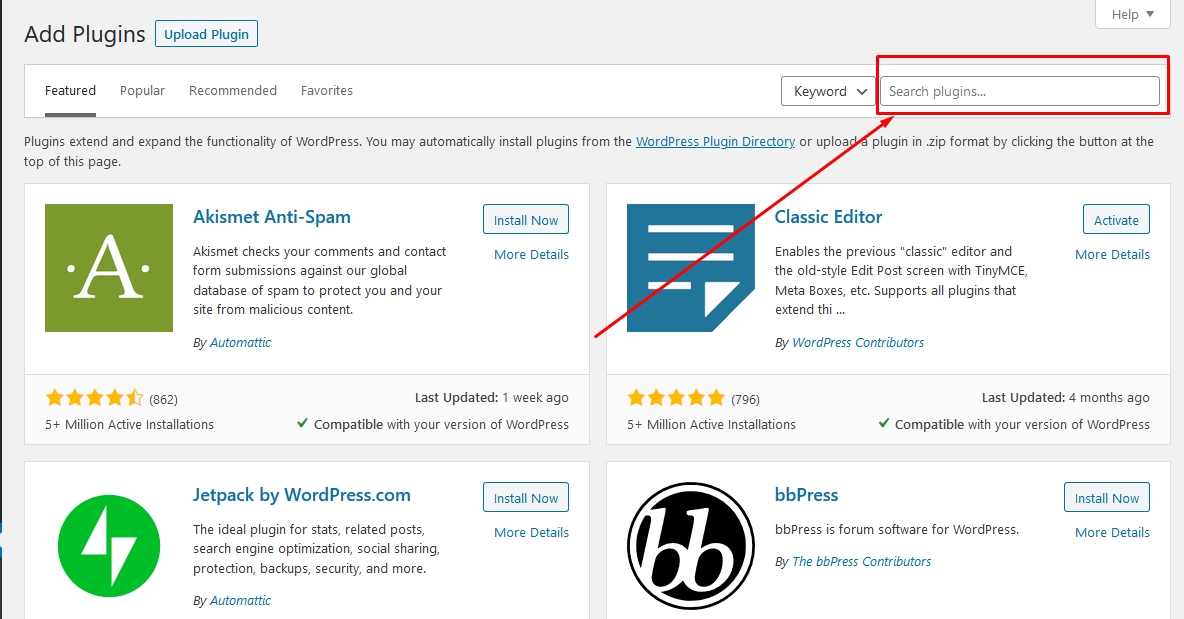
First of all, we have to log on to our WordPress website dashboard. So, we can add a plugin. Once you have logged on the website admin dashboard go to the Plugins > Add New. We will use a very popular free maintenance mode plugin whose name is “Under Construction” created by WebFactory Ltd. Simply you can search from Add Plugin page. An example is below:

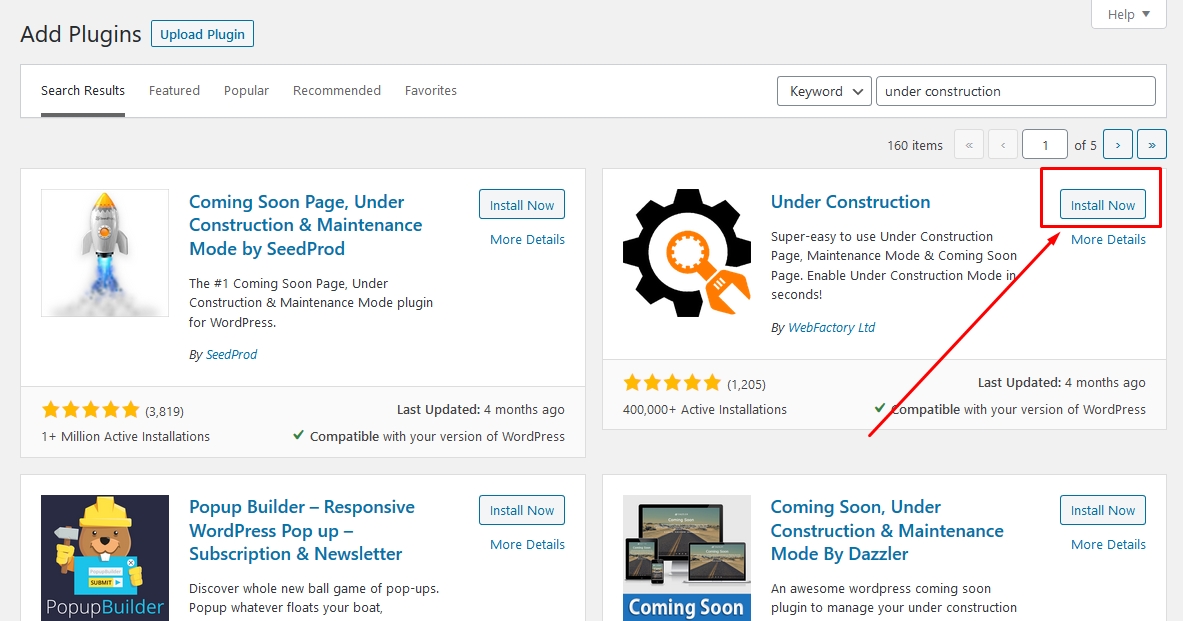
Right “Under Construction” in the search box. You will be seen “Under Construction” plugin on the first page which I discussed before. Just click “Install Now” and wait until it’s install. When installation will be complete click on “Active”. On the other hand, you can download this plugin directly from here.

Now, you will find a new menu under the settings tab in the WordPress dashboard. Click on the “Under Construction” menu. At this stage, you have to just on a setting to enable maintenance mode. Just enable this option. An example is below:

Now the user will be seen your website is under construction or maintenance. If you want to get better instruction, you can see my video below:

